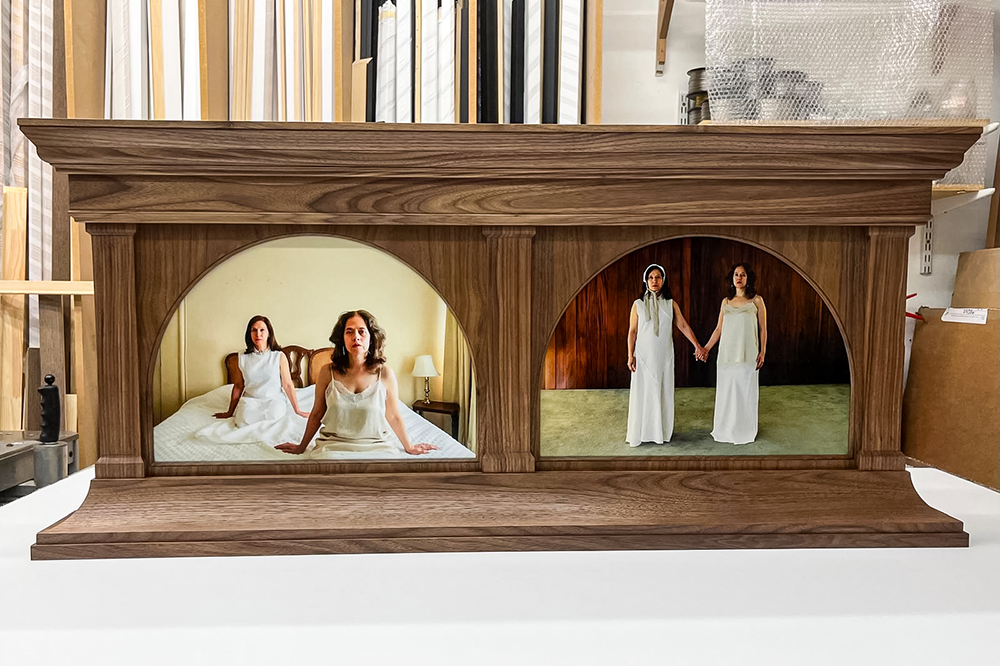
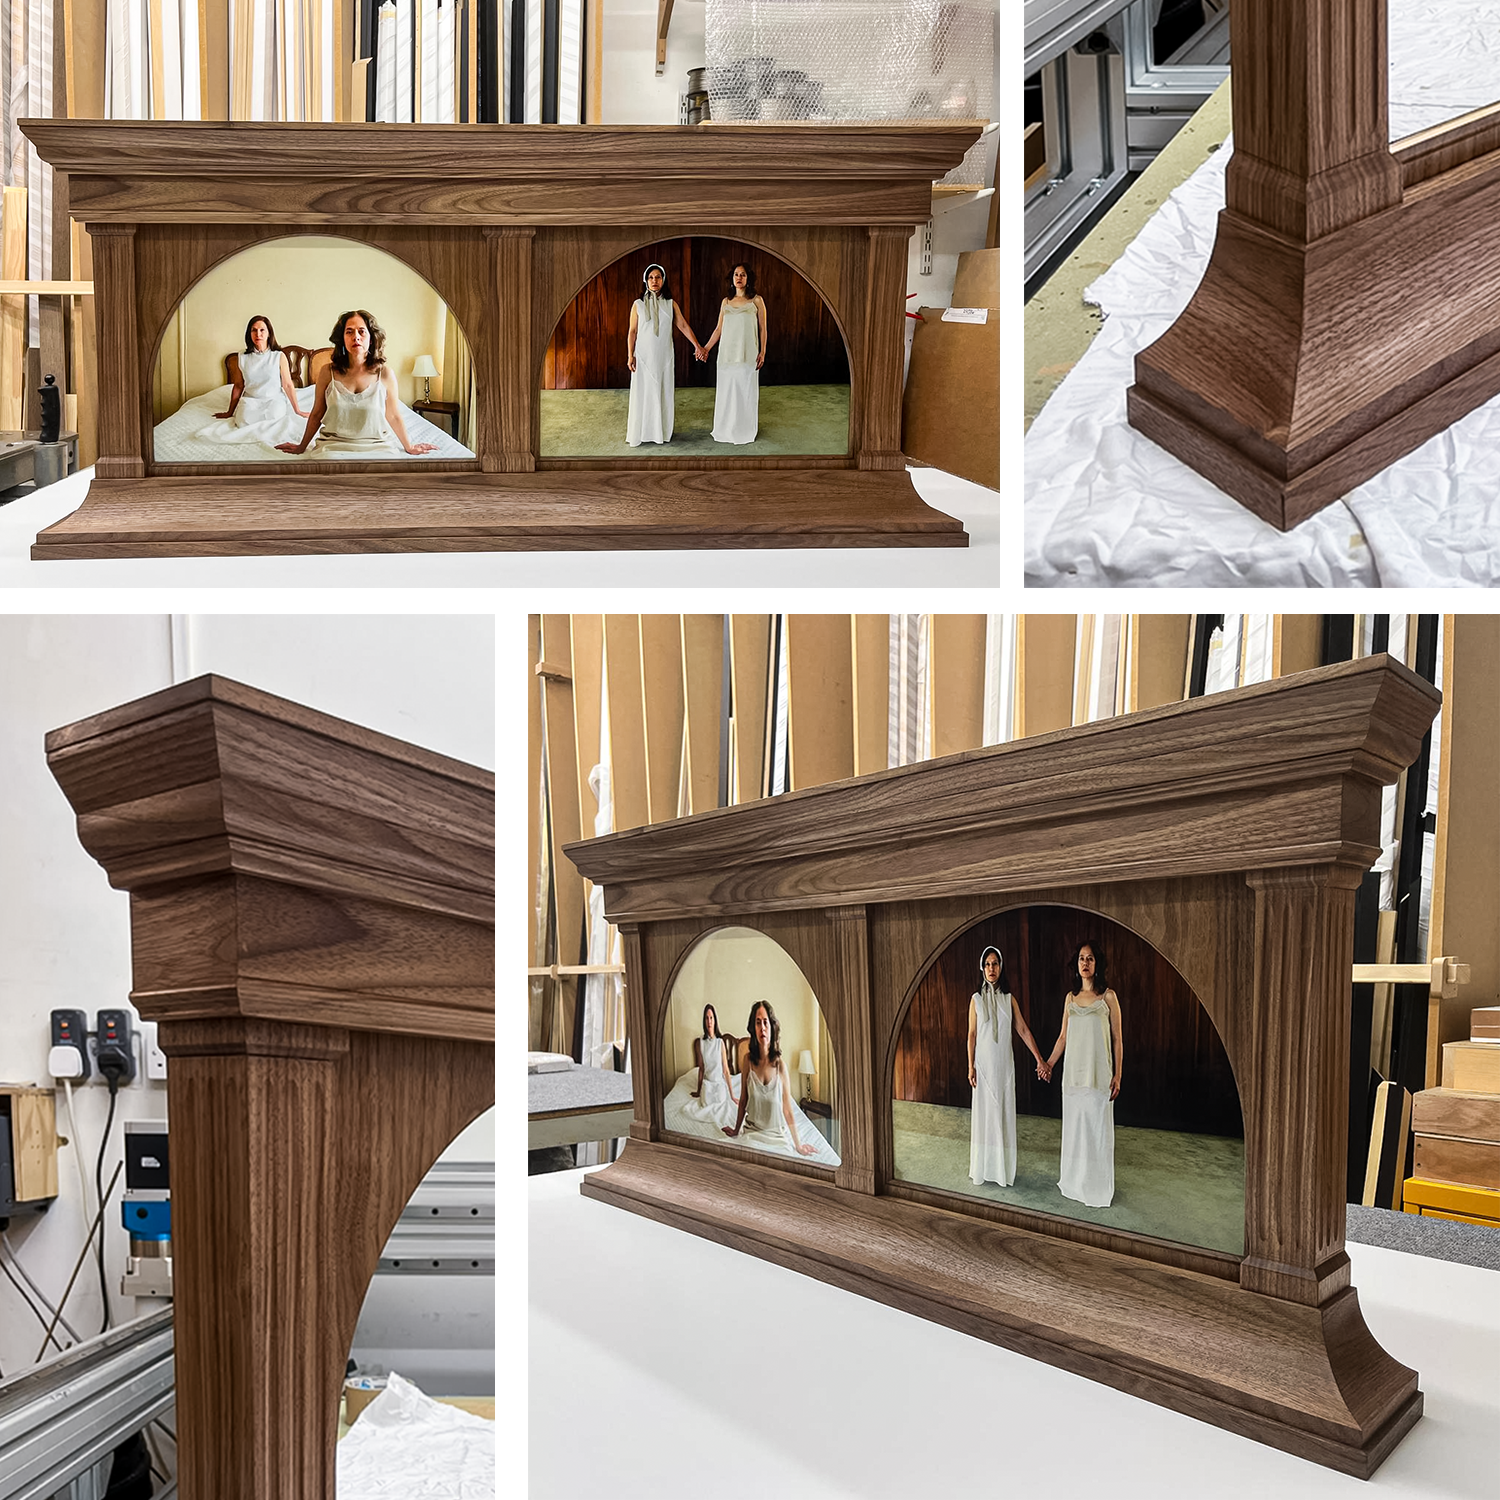
Italian Renaissance Frames still form a part of contemporary picture frame design. And professional picture framing workshops still exist. One of those is right in the centre of London historic Soho. Yes, it’s us, SohoFrames!
The Tabernacle Picture Frame has a long history and featured heavily in the Wall Furniture of the Italian Renaissance. These types of architectural picture frames were originally designed for works of religious art. They were often seen inside churches and cathedrals. An interesting point to note is that the frames themselves were intended to replicate the architectural wonders of these buildings.
Construction
The foundation of this type of specialist picture frame is the base plinth. This can be of any design, ranging from a simple rectangle with (usually) bevelled edges, to highly ornate, incorporating inscriptions as well as decorative design elements.
The sides of picture frame consist of columns. Again, these can be plain, as might be used on a modern interpretation of this classic picture frame, or fluted and ribbed. A “roof” sits on top of these supporting columns.
The frame can houser a single aperture, or multi-apertures for the display of diptych and triptych series of artworks. These apertures are usually arched shaped. However, when we make modern versions of this frae type, the apertures can be of any shape. This includes regular rectangles, squares, ovals, arches, and even odd-shaped and geometric designs. It all depends on the vision of the artist and owner of the artworks.
A Little History
The Tabernacle Frame is a medieval picture frame design that really came to fruition during the Italian Renaissance. You can find a little more information here. Fashion trends come and go and some also come back into fashion. Picture frames are no different. Although in the centuries after their heyday, the Tabernacle frame was still made and displayed in homes and art galleries around the world. Some 19th and 20th century Tabernacle frames can be seen here. SohoFrames of London continues this tradition. We make Tabernacle frames, both replicas of antique examples but also modern variants for the display of modern art.
Commission
The client contacted us with an urgent request. It was to make a special picture frame for the prints that would feature the final selection of their fashion degree exam. The frame would also form part of the graduation show. The design that the client had in mind was influenced by the Tabernacle frames of the Italian Renaissance.
The request was for a Double Arch Tabernacle Frame. Visuals were sent. Along with the written information we received we produced a selection of designs that were then fine tuned over email.
And they wanted it in one week. Now making a complex picture frame starting from planks of raw timber normally takes 3-4 weeks, depending on the complexity of the design and construction. However, as they wanted the frame to have a contemporary look, many of the decorative embellishments normally seen in this frame type were not needed. They also wanted natural wood rather than a 22k gold gilded finish, which significantly cuts down the production time. We still however had to work late into the evenings to make it.
Materials
The client requested that we make the Tabernacle frame from Black American walnut. She also wanted us to move the colour of the natural timber a little redder and for it to have a soft polish. The finish would turn the frame into a piece of fine Wall Furniture.
We selected the timber ourselves from our local FSC timber yard. They know us well up there and it is one of the few places where we can go, pull planks of the shelves and pallets so that we get exactly the right kind of looking wood for the commission in question.
First Steps
Once the initial consultation period was over (which took place over 3 days) we produced a sketch of the proposed frame design.
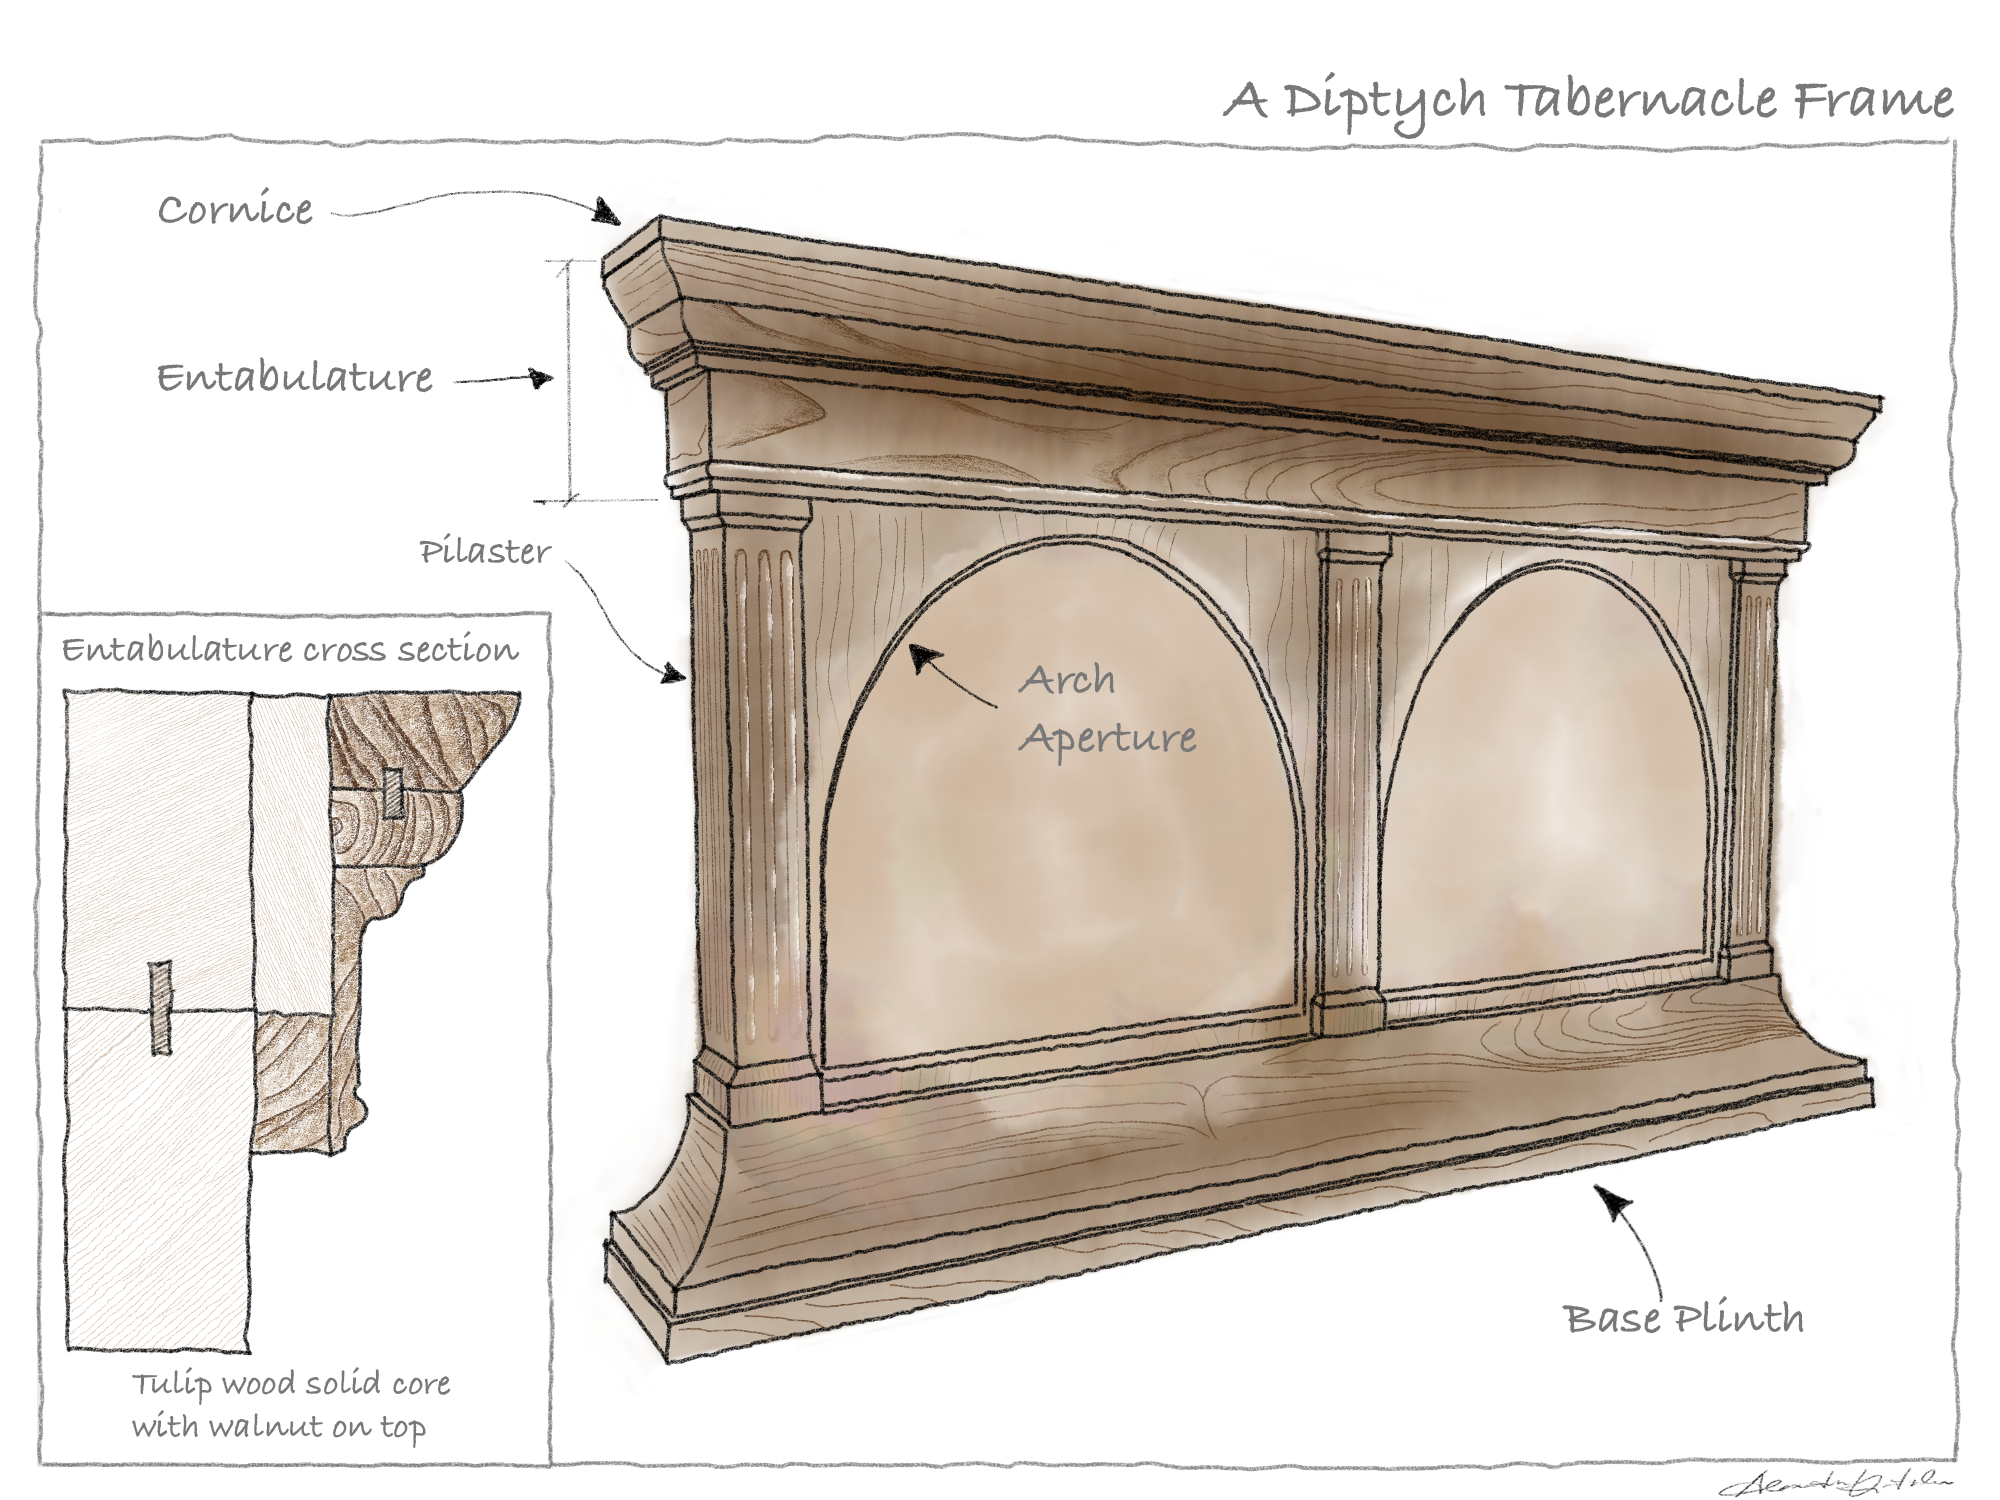
We work with every client to ensure that their vision becomes a beautiful reality. This involves extensive design work, all of it without obligation. The process consists of visuals that the client sends us, including those produced by ChatGPT and other online Ai design tools. We turn these into sketches and slowly, these first sketches give life to a real physical picture frame.
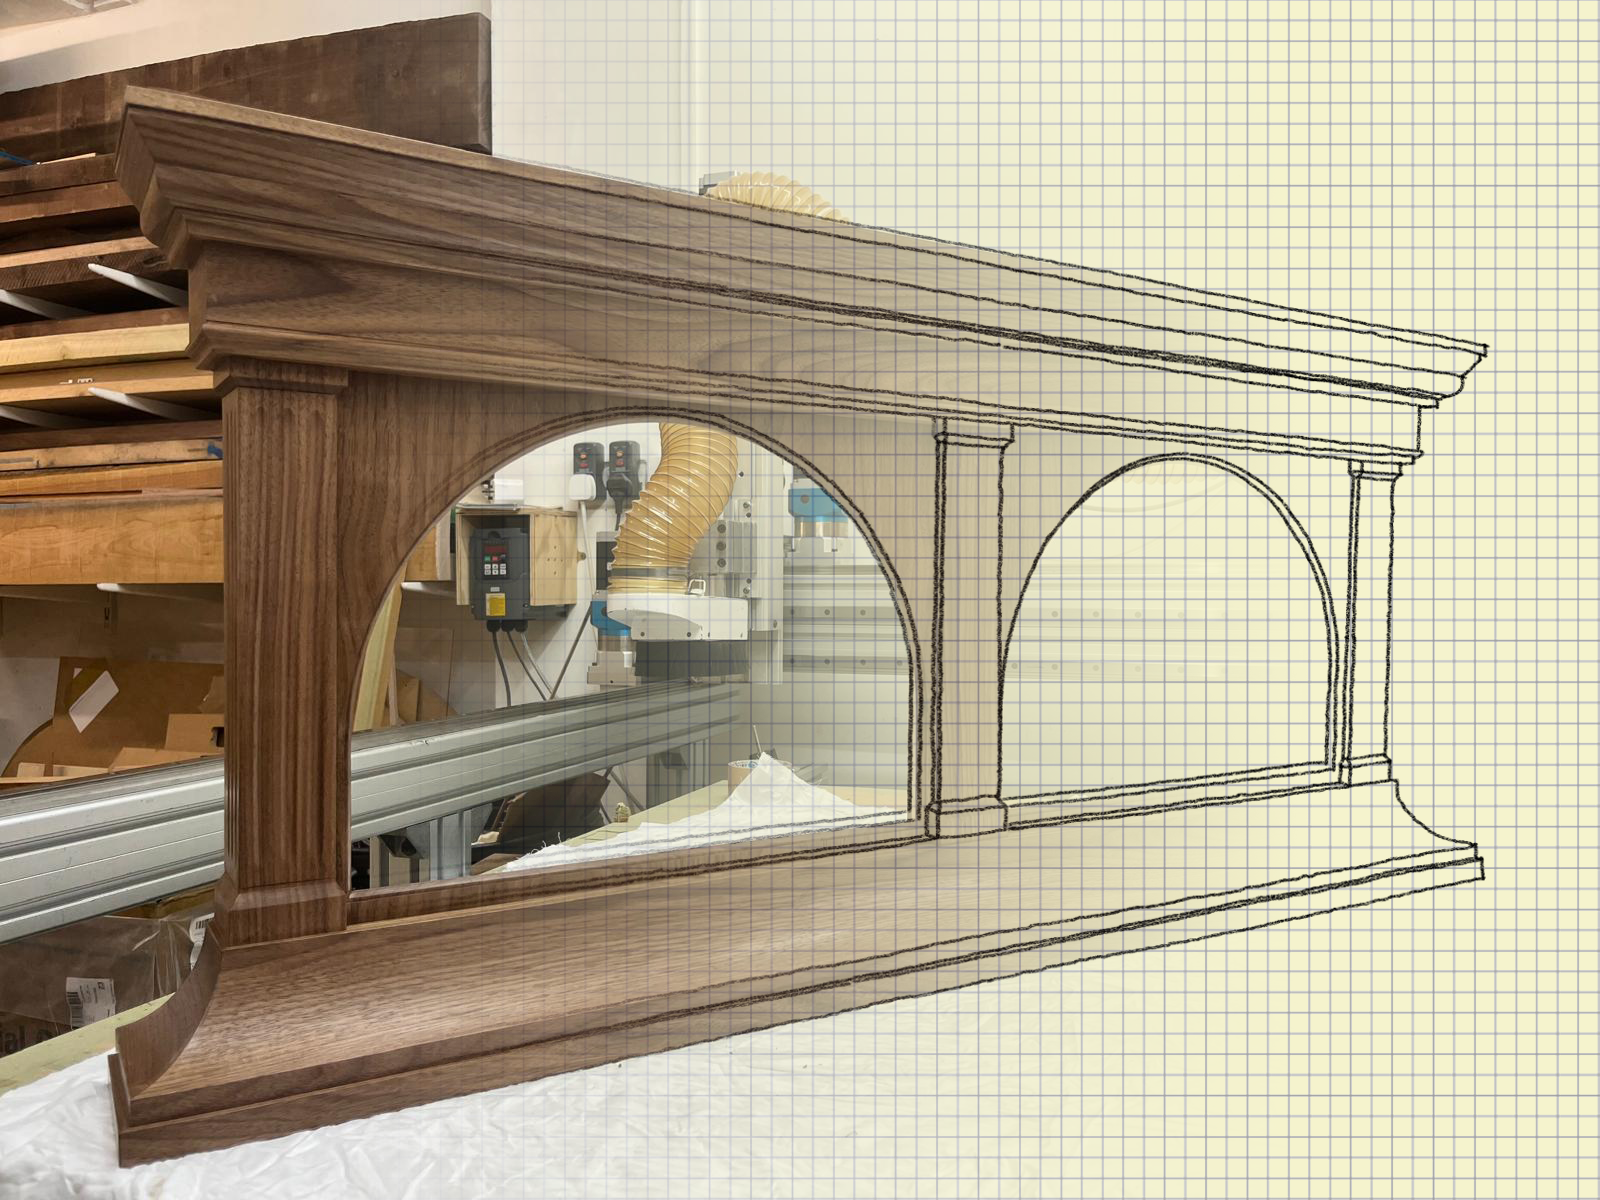
When the client approves the design, we produce a final 3D computer render of what the proposed frame design would look like along with all the measurements. We can then fine tune any or every part of the frame, adjusting details, the sizes of each of the individual design elements. This can include the artwork apertures size and shape as well as the overall picture frame size.
Once the final render was signed off, the costs finalised and agreed, and a deposit paid, we began work in our Soho workshop on the actual making of this frame.
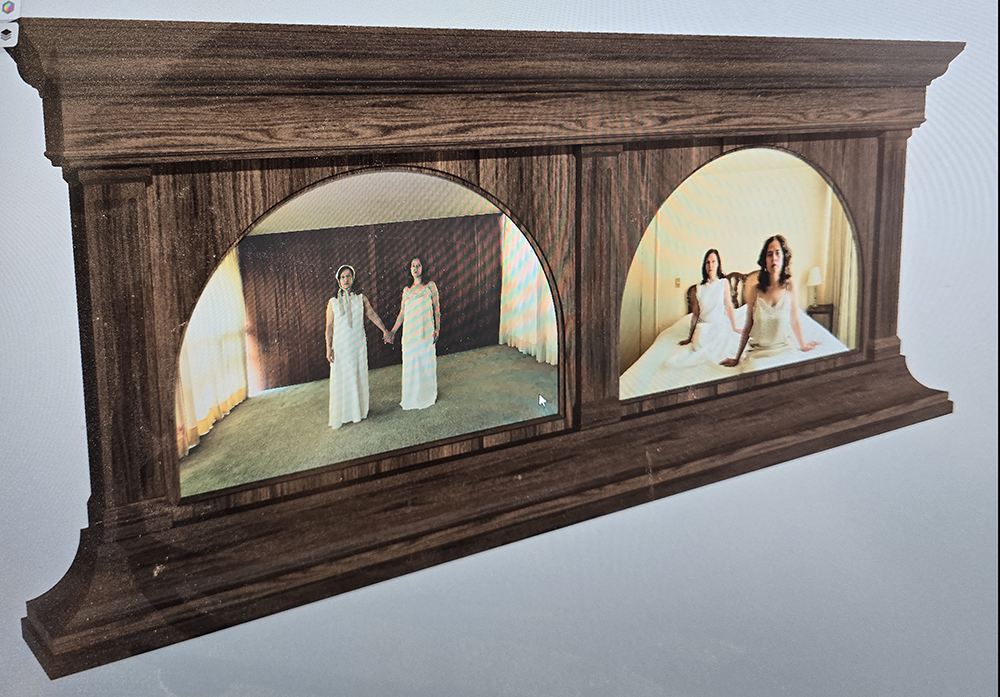
Making the Tabernacle Frame
All good buildings must have firm foundations. A Tabernacle picture frame is not different. With this in mind, the first thing we did was make what we call the carcass. We made this from solid American Tulip wood, which is also known as Poplar.
All Tabernacle picture frames have a solidity to them, and this was no different. The frame was substantial, being 1200mm long x 600mm in height.
The Foundation
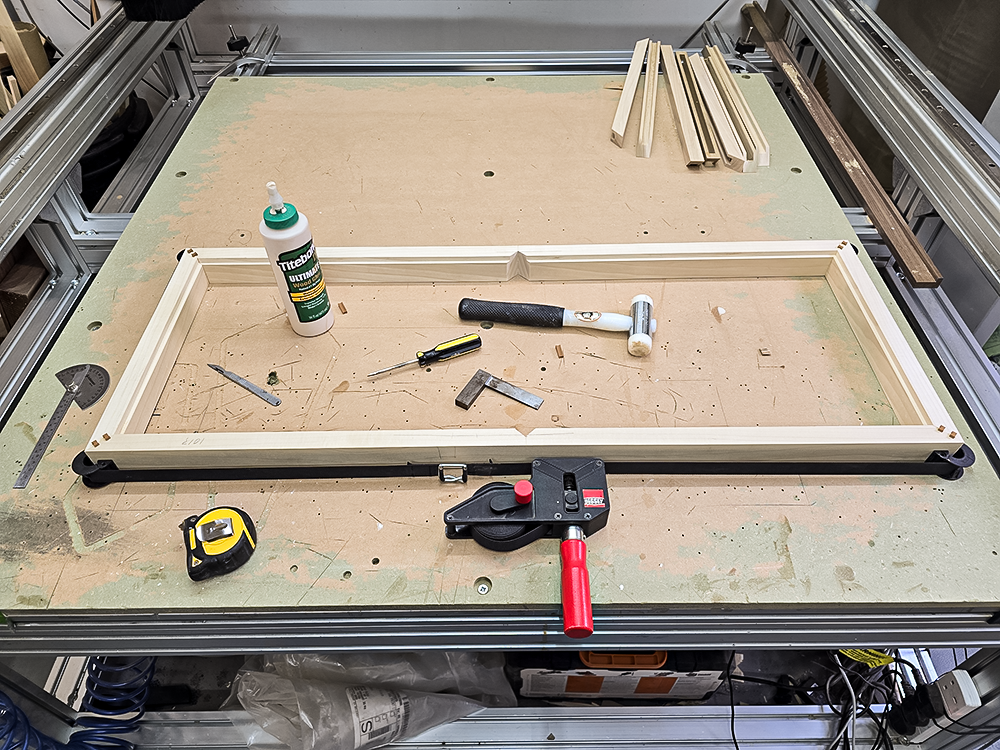
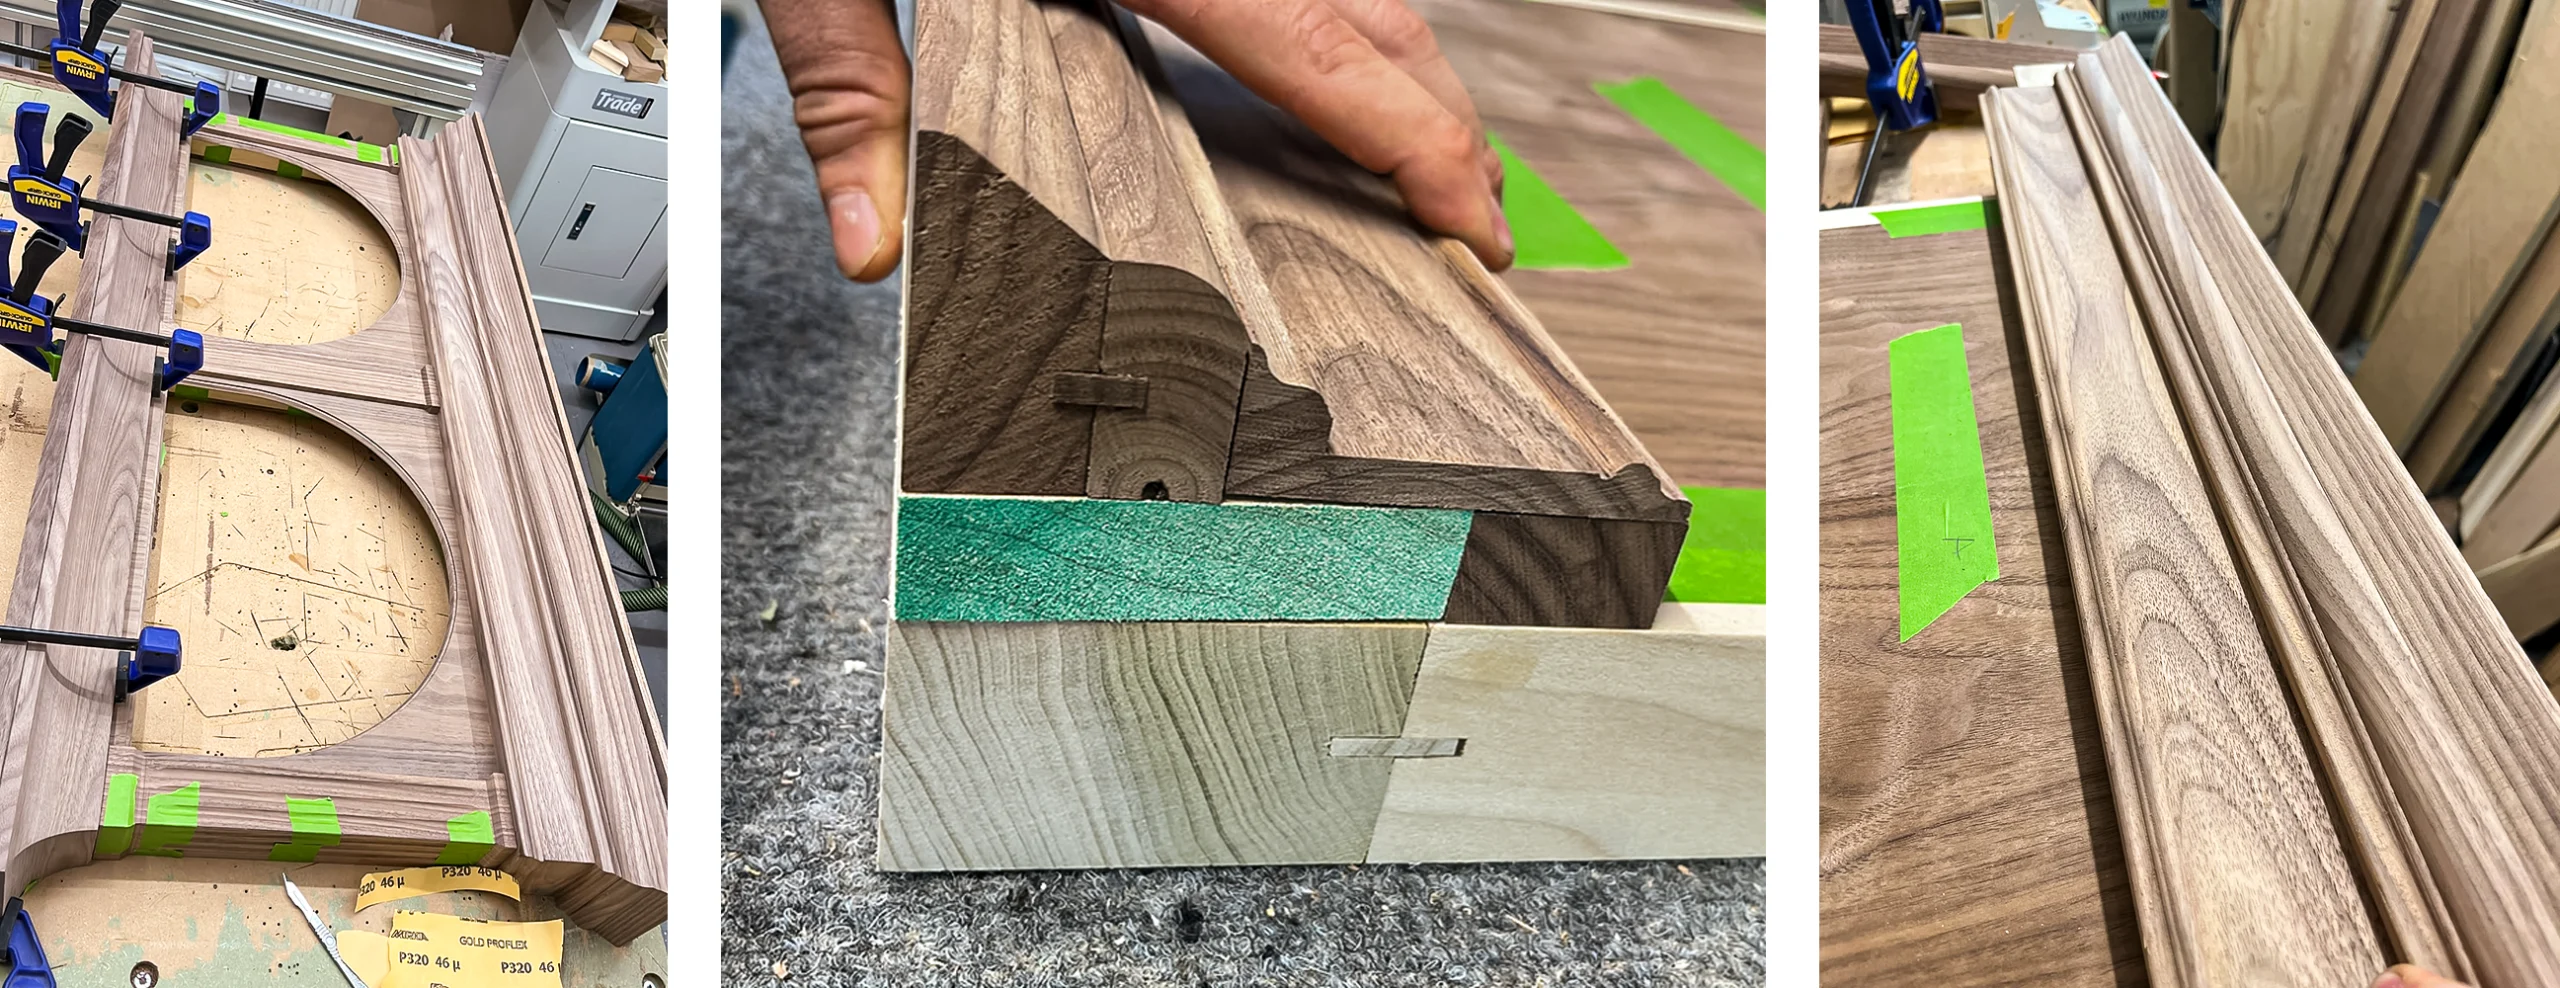
The photo shows this simple foundation piece, the “frame carcass.” We mitred the end of each of the lengths and then joined them together using Titebond wood glue and Hoffman butterfly wedges. On the inside of each long section, we cut to V-shaped notches into the wood using one of two reliable Danish Morso guillotines. This notch would allow the fitting of the diving central pillar.
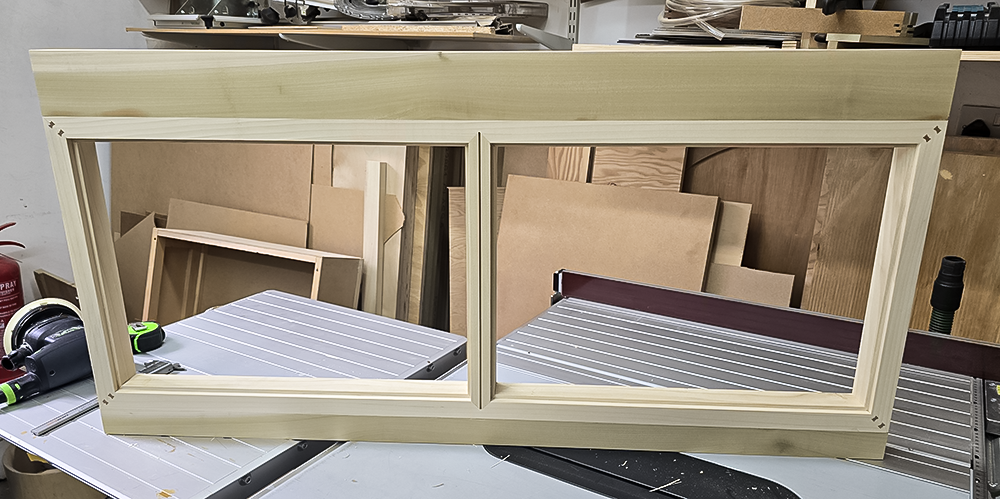
This photo shows the fitted central pillar. We milled a deep groove into the centre as this was going to form the location point of the Walnut façade. You can see how perfectly it fits into the two upper and lower long sections of the frame.
The Mantles
After that, we milled and fitted a heavy mantle at the top and a smaller one for the plinth. The carcass was then clamped while the glue dried. The photo below shows the frame carcass. Below it are two flat panels of walnut that we were going to cut the arch apertures into.
Window Panels
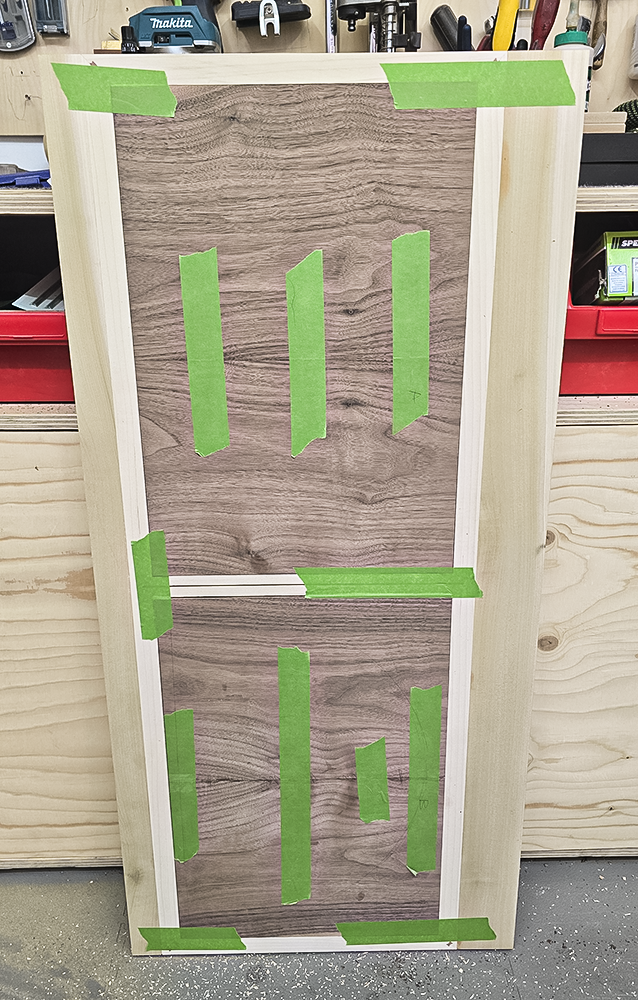
Of course, the next step was to fit the two walnut panels into the window apertures cut into the Tulip wood carcass. We made these panels by sawing 6mm thick sections from the selected plank. Careful adjustments we made to the top and bottom sections of each piece that made up the individual panels so that they fitted perfectly together and looked like they were in face a single unbroken piece.
The Façade
The next step was to cut the arch apertures into each of the panels. You can see that the edge of each window has a bevel and groove design. When this was done, we fitted all the other separately milled walnut pieces onto the frame carcass.
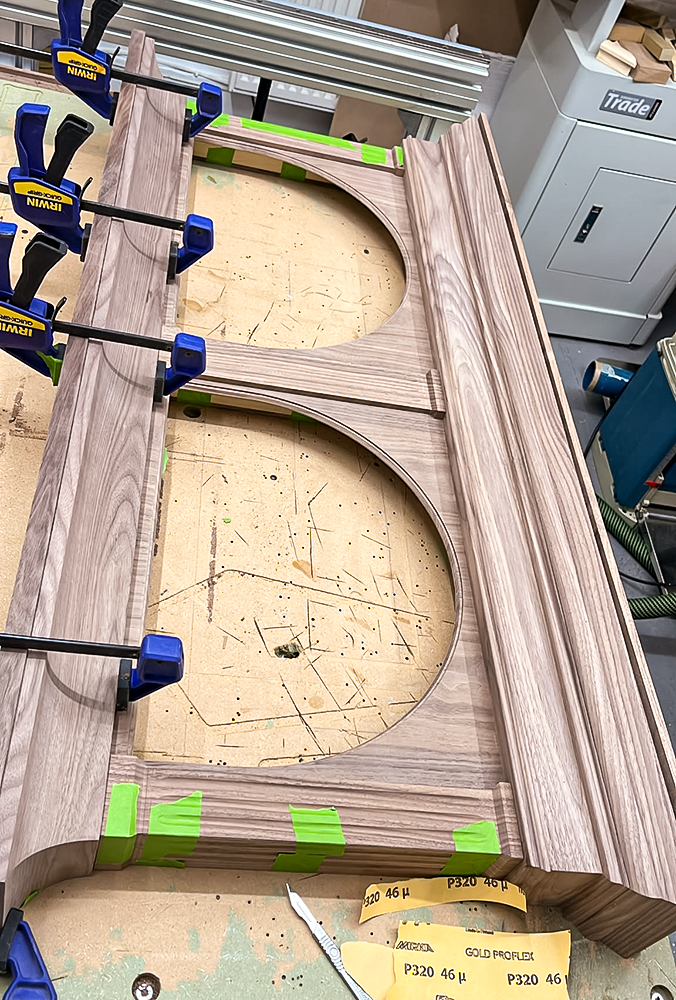
The Finished Frame Before Artwork Fitting
When we finished making the actual frame, we check that every part meets our quality standards. We then finish preparing the surface using specialist carpenter scraping tools, fine French rasps, wire wool, and depending on the surface, various grades of sandpaper. Applying the precise density and colour of wood stain is the next thing to do. Once that has dried, we polish the frame to the desired degree of lustre.
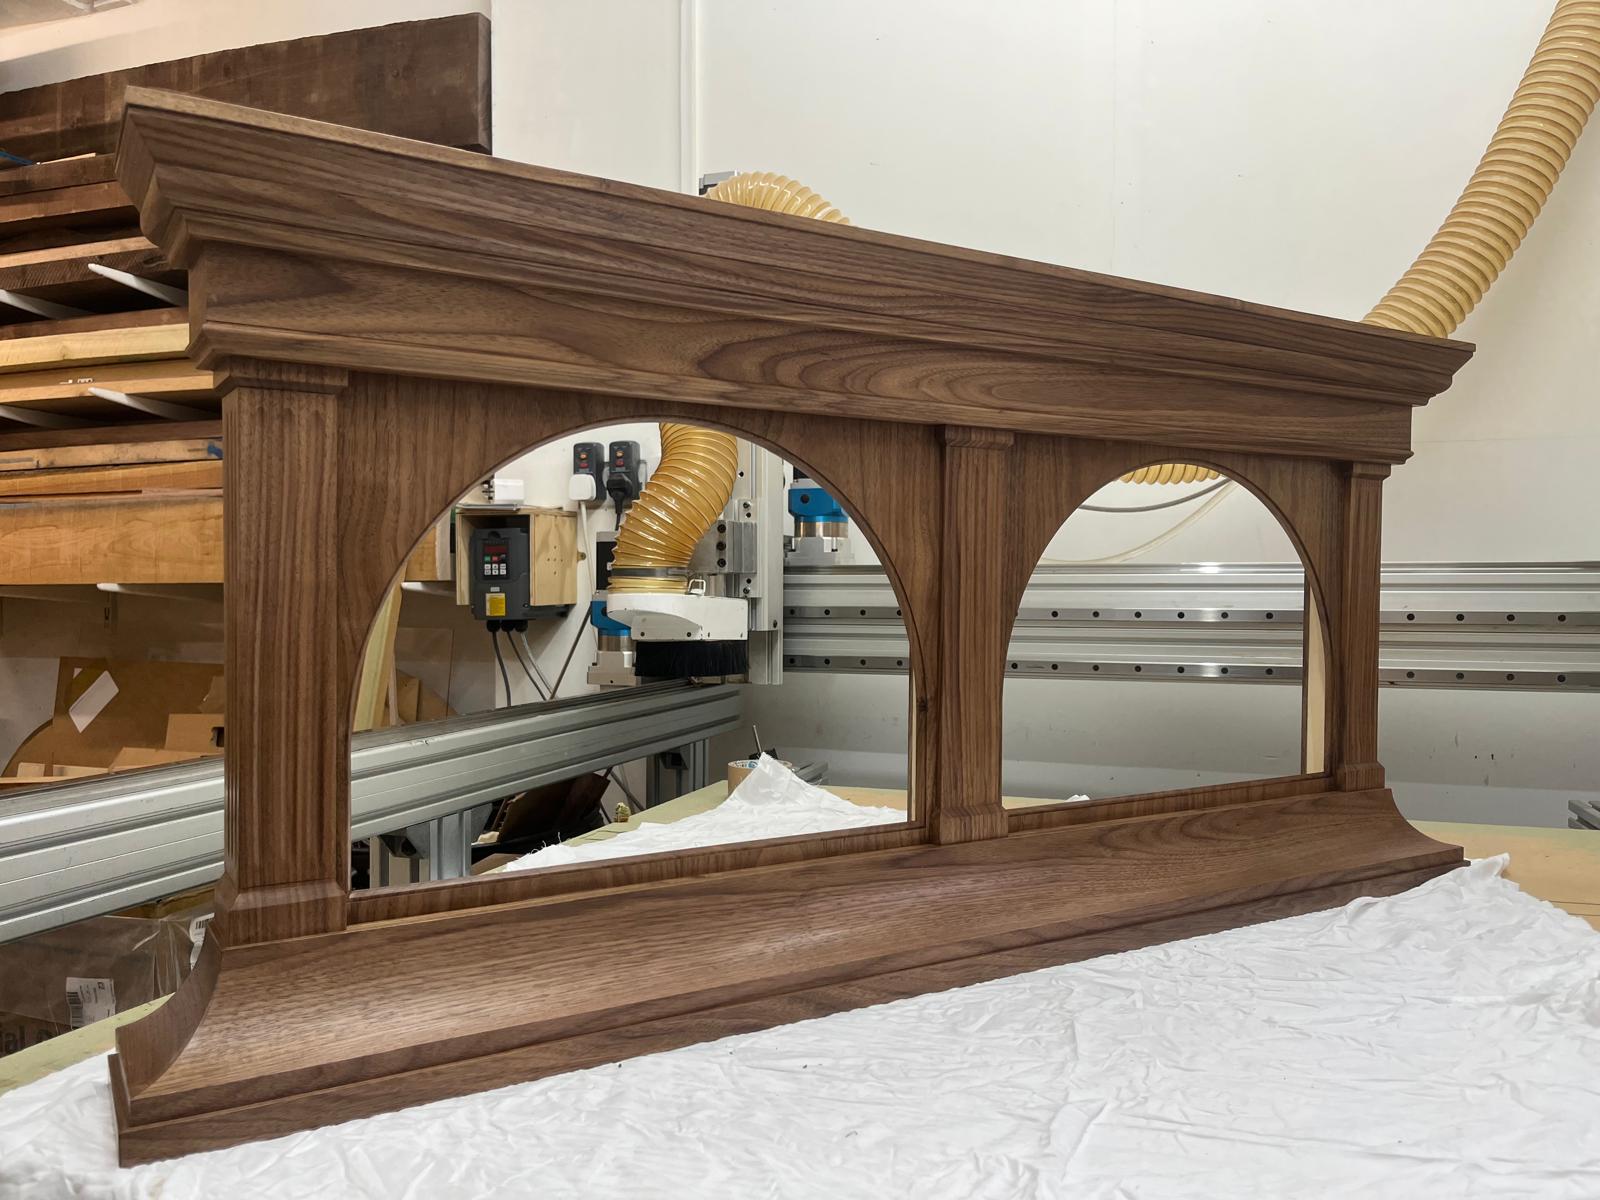
Fitting The Artwork
While Master Framemaker Curtis O’Dell was making the frame on the second floor of our workshop, Greg Wood, our Client Services Manager was busy printing the images onto fine art cotton paper stock. Both frame and prints then went down onto the ground floor where Master Framer Joe Coward fitted the artwork into the frame. He glazed each aperture with anti-reflective artglass. The frame was inspected, wrapped and then stored until the client came to collect. From start to finish the entire process took one week. And it all began from the inspiration of the Italian Renaissance!
Contact us if you’d like to find out more.